2012/12/16

Some Recent Bird Photos

The trailer is mothballed for the winter, and the party tent has been dismantled.

That makes it a good time to post some bird photos.  First is a Palm Warbler, taken in October at Hammonasset Beach State Park in Connecticut.

Many different warblers migrate through Connecticut in the spring and fall.

The Greater Yellowlegs can be found here much longer; only recently have they moved on.


House Finches may be found here year-round.


In November we were visited by a Black-Headed Gull, shown here in non-breeding plumage.


This year we are fortunate to have both Red Crossbills and White-Winged Crossbills with us in numbers.  They feed extensively on the pine cone seeds.

This is the male Red Crossbill:


Below is the male White-Winged Crossbill, identifiable by the white patches on the wings.


This shot captures males of both types:


The females of both types sport a greenish-brown color, as seen here in the White Winged Crossbill:


Finally for today, along with the crossbills we have had numerous Red-Breasted Nuthatches:

 
Compare this coloration with the White-Breasted Nuthatch commonly found hereabouts:

2012/12/12

Northern Shovelers

Shovelers are aptly named for their beaks, which have comb-like projections to filter food - often aquatic invertabraetes- from the water.  

The male might be mistaken for a mallard, aside from the extended beak.

2012/12/11

Harlequin Ducks

Taken on Cape Ann, Massachusetts, 11/23/12.


These ducks are among the most colorful, and among the most difficult to photograph.  They ride the Atlantic surf from Cape Ann and north, close to shore, and dive to feed on the vegetation below.  They are extremely shy and will quickly move away from any human presence.  

My wife was fortunate this year to locate a spot where they were close in to shore, with good lighting, and apparently unfazed by our presence.

To add to the difficulties, their dark forms against a reflective surface make getting a proper exposure challenging.  Here, we can see the dark eyes against the dark feathers of the face while the water is not over-exposed.  In several years of trying, this is the first time I feel satisfied with a photograph of the harlequin.

2012/12/10

Time to Hibernate

To all blog followers,

The teardrop is being built outside, under a party tent.  Here in Southern New England we have the potential for significant snow accumulations that would destroy the tent.  Additionally, temperatures are frequently colder than glues and finishes require.

Thus we have decided to hibernate the trailer for the winter.  Within the next couple days it will be moved into a storage unit and the tent dismantled.

I anticipate that the project will be reactivated in early April.  Meanwhile, I may occasionally post some photographs here just to keep in touch.

In any event, do please check back by April 15, 2013, for the resumption and completion of the project.

Emmitt 

2012/12/03

Hatch Urethaned

Where a wood like oak is concerned, there is nothing like polyurethane to bring out the characteristics that make the wood so iconic.

Today we applied polyurethane to the inside of the hatch.  The first photo is a "before" shot, with the hatch elevated to provide easy access to the inside of the bottom area.
 
The following shots were taken after the urethane was applied:


 End grain,  lamination and plug.  How sweet it is!


Polyurethane is a wonderful thing!
 

2012/12/02

The Hatch Revealed

After installing the beadboard we needed to cover the outside of the hatch with 1/8" birch plywood.  This was a two-step process, whereby we first attached a 5' plywood section, and we then affixed a piece fit to the remaining area.

Below, the second piece of 1/8" birch is installed, and the joint/end shimmed as appropriate.

After letting the glue set, we removed the band clamps to reveal the hatch as shown below, with the top of the hatch at the bottom of the photo.

Next we test-fit the completed hatch to the opening.  There was no precision in this fitting and thus no judgements made.  Note that the crosspiece is there merely to provide an in-situ clamping element.

Once the hatch was upside-down on the table, one couldn't resist the photo ops:


Sean couldn't resist the opportunity:


Unfortunately for him, the hatch will not be installed upside-down, and such restive opportunities will not exist.


2012/11/27

Skinning the Hatch

The hatch structural design calls for laminated ribs covered by a 3/8" "beadboard", topped by a layer of 1/8" birch plywood.  While the beadboard has been installed (see previous post), we have recently been determining how exactly to install the birch plywood layer.

The issue is that we have a 57+ inch wide piece of plywood bent to the contour of the hatch, layered on top of the beadboard.  We need to assure a good fit and tight bonding, since we can only provide firm attachments at the ribs, and must rely upon glue for the balance of the bond.

Shown below is our solution:  13 band clamps, anchored to the table at both ends, with the hatch itself in the original construction jig.  This arrangement prevents the hatch from spreading under pressure, and allows us to apply adequate forces to the plywood to closely bond it to the rest of the structure.


Only one of the two pieces of 1/8" birch plywood is shown.  The joint will be made in a relatively flat portion of the curve.

The straps are anchored at the bottom end of the hatch by wrapping them under a 2x6, which positions them tight to the curve, and then around an anchoring block.  At the hinge end the straps flow down over the table end and through the ratchets, which are anchored to an angle iron clamped to the bottom of the table.

The strap assembly will be slackened and held off the hatch while glue is applied.  The straps will then be repositioned and tightened to uniformly clamp the plywood to the structure.  Staples will then be nailed along each rib to hold the plywood in place.  After the glue has cured for the main (large) sheet of plywood, the process will be repeated for the smaller piece.

Since our temperatures are near freezing at night, the entire assembly will be covered and warmed by an electric heater to promote proper curing of the glue.
  

2012/11/21

The Hatch, Realized

The hatch has been a long time in coming, but has arrived.

Our last post showed the "first fit" of the outer frame to the opening.  Next, we returned the hatch to the table jig and began fitting the inner ribs.


Fitting the inner ribs meant not only cutting them to the proper lengths with the proper end points and angles but getting them profiled to the proper thicknesses in order to maintain the correct profile for the slat application.

Once that was accomplished we began the permanent assembly of the frame and ribs.

Below the full frame, with temporary spreaders, is shown in situ.


Note that the bottom spreader is not parallel/at right angles to the balance of the structure.

With the framing fit to the actual location we added a 1/4" plywood/hardwood spreader jig to the hatch in order to retain the fit.

The theory was that this addition would lock the hatch's orientation to the opening, and it so far appears to performed as expected.

The next step was to return the hatch frame to the table jig and begin installing the "beadboard", inappropriately named since the intervening bead was omitted due to the narrow width of the part.  


Sean devised an ingenious glue pot and gun assembly that permitted dispensing a metered amount of glue into the groove of each piece.  Each slat was then placed on the hatch and air-nailed in place.  


Above is a view of the glue gun applying a bead of glue into the groove of a slat.  Without this tool we would have spent countless hours applying the glue and wiping the overspread from the finished product.  As it was, the application was expeditious and with minimal overspread.
 

Above is a view of the inside at the end of day one, with the plywood jig still in place.

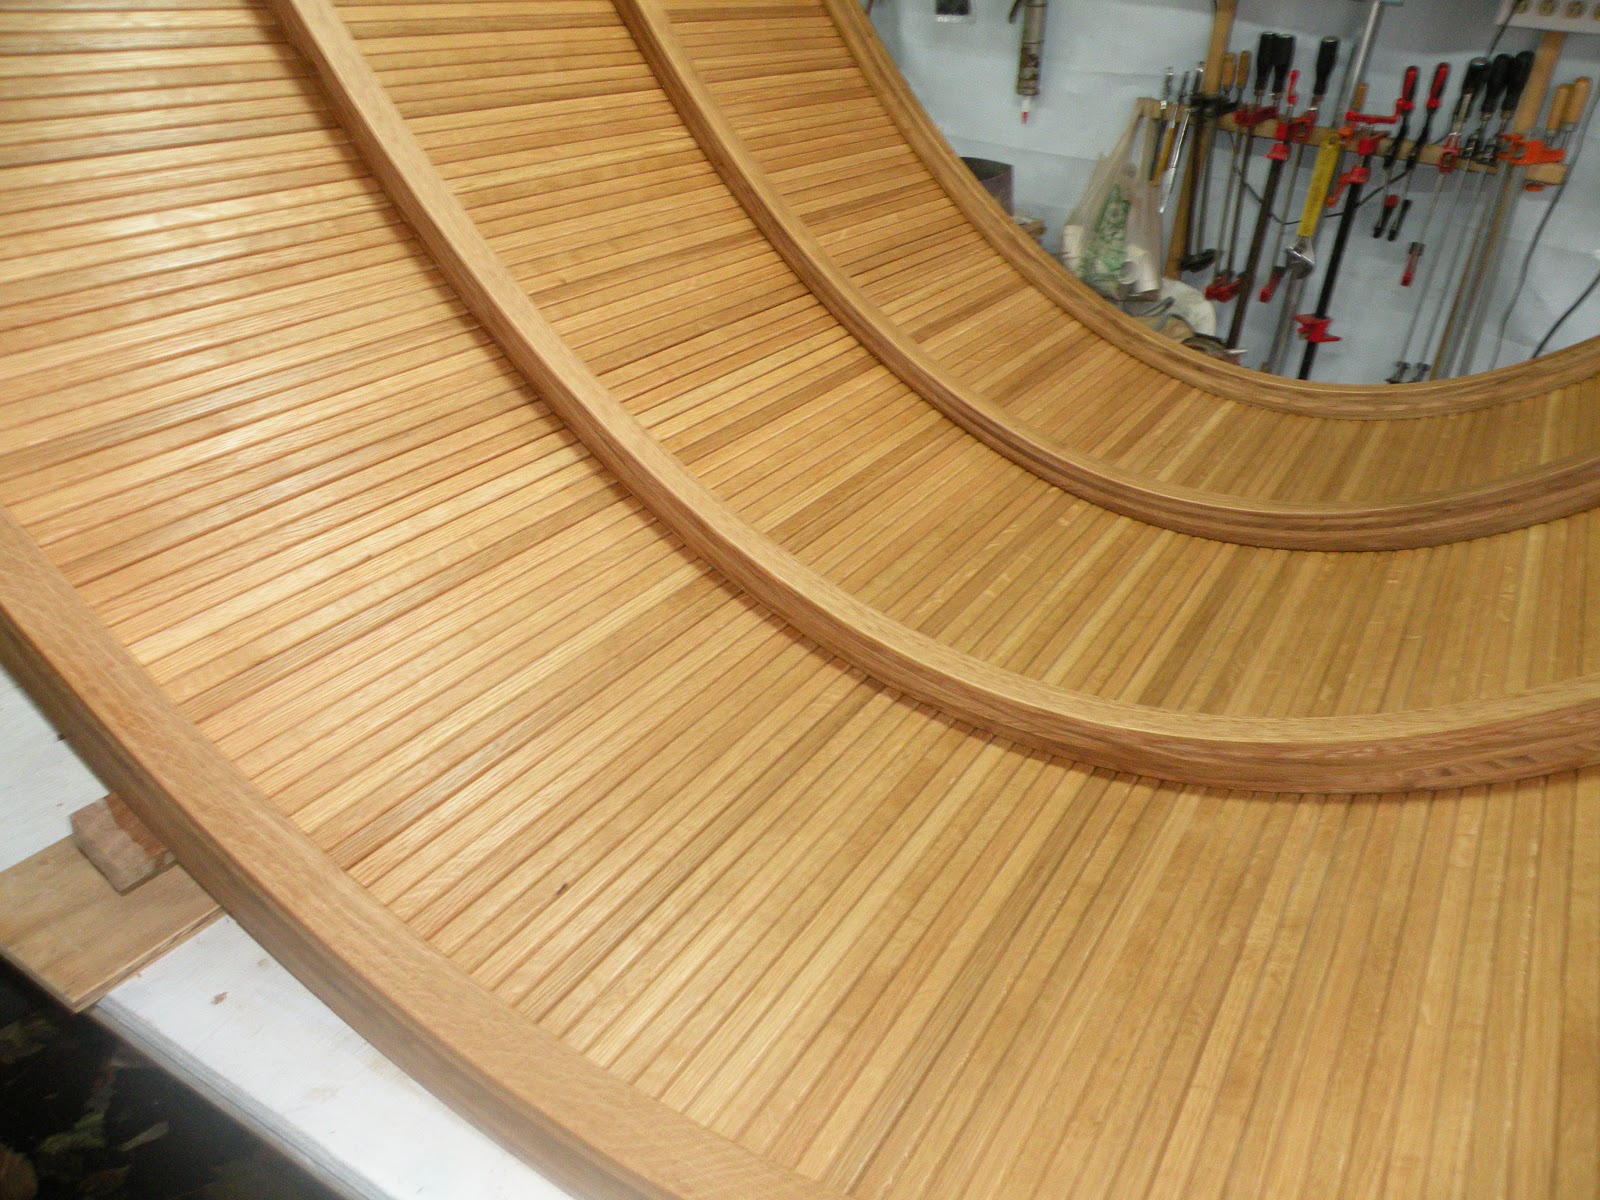
By the end of day two the application of 117 slats was complete.  We will still need to apply a layer of 1/8" baltic birch plywood to the exterior for structure, but the inside is revealed.


The view of the inside shown above will be visible when the hatch is open.  I truly love the result, even without urethane to enhance the oak.

In the views shown, the hatch top is to the right and the bottom to the left.


The sad part is that, once the plywood is installed on the outside of the hatch, we will wind down for the season, preparing to store the trailer for the winter season and dismantle the "party tent" for fear that snow load would compromise it.  Add to that fear the fact that temperatures are getting to be too low for glue and finishes, and we have concluded that the best course of action is to put the project away for a few months.

More soon ....